If you’ve ever been intimidated by the thought of fitting your own bathroom, but you don’t want to pay professional bathroom installers, it’s time to take a deep breath and relax. With the right tools and knowledge, you can learn how to fit your own bathroom in no time. Just be patient, take the time to learn what you need to know, and everything will fall into place.
In this blog post, we’ll cover all the basics of planning, purchasing, and installing a new bathroom. So get a cup of coffee, block out a couple of hours in your diary and let’s get to work…
Planning Your Bathroom Installation
Before you start anything else, make sure that you have a plan for fitting your bathroom. Measure the space carefully and decide what kind of fixtures and fittings you’d like to install. Take into account any existing plumbing or wiring that may need to be re-routed or replaced before you begin. Making sure that everything is planned out beforehand can save you time (and money!) later on. It’s also important to research local building codes some counties require permits for certain types of work.
Take a few sheets of paper or a sketch book (preferably without lines), a pencil and ruler. Now draw out the walls to the best of your ability with the position of windows, doors etc.

Write in your measurements to help you understand the space better and what will fit into it. Try to write in a measurement for each wall and the sizes of doors/windows etc.
It’s important to consider the style of bathroom you are looking to achieve. Modern? Minimalist? Traditional?
Purchasing Fixtures & Fittings
Once you’ve got your plan ready, it’s time to start shopping for fixtures and fittings. Make sure that all of the items are compatible with each other—for example, if you’re buying a new bathtub, make sure its measurements match up with the size of your space. You’ll also need to purchase any necessary hardware such as screws and bolts, as well as any additional materials like grout or caulk. Don’t forget about accessories like shower heads or towel bars either!
It’s worth visiting some bathroom showrooms about not to see what’s available. You can also ask the staff any questions that you have, around measurements, fitting etc.
Another great tip is to watch Youtube videos on specific tasks as you come to them. This will help you find answers to questions you didn’t even think to ask.
Some subjects you might want to find videos on could include:
- How to measure a bathroom
- How to rip out an old bathroom
- Types of bathroom taps
- How to fit a bathroom sink
- How to replace a radiator
- Types of bathroom tap
- How to silicone seal around a bath
In fact, any question, no matter how small, there is probably an explanation video on it. Take the time to educate yourself by breaking down into smaller tasks and learning about each one. You will find that it’s not so difficult after all.
Rip out your old bathroom
Before you rip out your old bathroom suite, rent a skip, so that you have somewhere to throw everything away. Make sure it’s a medium or large one. You’d be surprised at how much stuff comes out.
Next you need to shut off the water supply. Don’t start any work until the water supply is stopped otherwise you could cause a leak and end up with a huge problem!
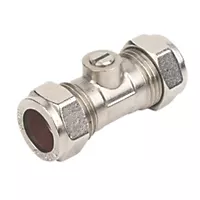
It’s not always practical to shut off the supply to the whole building. Look for inline isolator valve on the water supply to your sink, bath and toilet. These are usually operated with a flathead screwdriver.
If your taps don’t have inline valves, you will need to shut off your home’s water supply at the main isolator, then you can fit some yourself. You may want to get a plumber to do this for you if you want to minimise the risk of causing a leak.
When you are happy that your taps have been isolated, you can remove the old suite and chuck it in the skip.
You’ll also want to remove any radiators or heated towel rails and any bathroom furniture. Finally, use a lump hammer and chisel to chip away your old tiling.
Restore Your Plasterwork
Once your bathroom is completely cleared out, you need to have any walls re-plastered or at least skimmed. If you don’t have any experience plastering, I would recommend getting a professional plasterer to do this. Otherwise your surfaces will likely look rough and pitted and it will ruin the look of your walls.
Before plastering, think about whether you need to do any rewiring. If you are installing a heated or illuminated mirror, you may need to re-route a mains cable to the unit. It’s much better to do this before plastering, so you end up with a nice smooth finish on every wall.
Installing Your New Bathroom
Once you’ve got everything purchased and ready to go, it’s time to start installation! Depending on how much work needs to be done, and how much time you are able to spend working on your renovation, this process could take anywhere from a few days several weeks.
Start by following the instructions on any fixtures or fittings that come with their own installation guide—these will give step-by-step instructions on how best to mount them into place. Remember not to overtighten any screws or bolts during installation—this could cause damage down the line! Once everything is secured in place, finish off with caulking around tubs/showers/toilets/etc., making sure there are no gaps where water could seep through later on.
Conclusion: DIY bathroom renovations don’t have to be intimidating! By following these steps and doing your research beforehand, you can learn how to fit your own bathroom with ease – saving yourself both money and hassle in the long run! All it takes is some careful planning ahead of time and attention during installation – just follow these steps for a successful DIY renovation project! Good luck!